
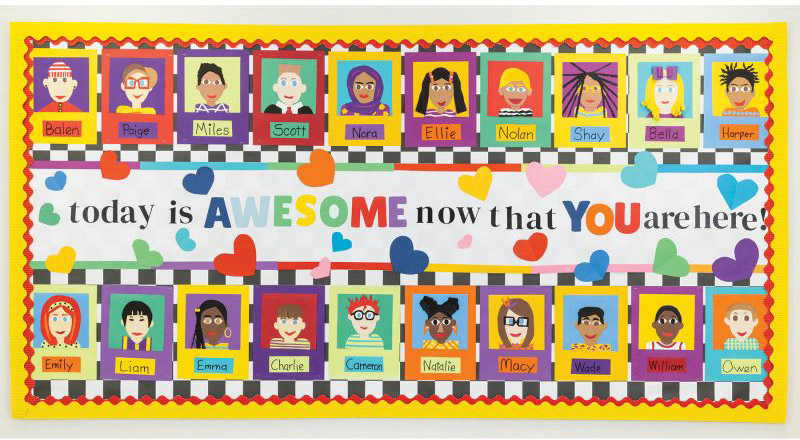
Today Is Awesome Bulletin Board
Celebrate individuality and every person in the classroom with this constant reminder that everyone matters.
Dixon Ticonderoga Materials:
- Retro Hopscotch Fadeless® Inspired by Schoolgirl Style™ Paper, 48" x 12', #P0040098 or 48" x 50', #P0040095
- White Fadeless® Paper, 48" x 12', #P0057018
- Bordette® Decorative Border, 2-1/4" x 50', Canary, #P0037084
- Bordette® Decorative Border, 2-1/4" x 50', Flame, #P0037034
- Tru-Ray® Construction Paper, 9" x 12", Vibrant Assorted, #P102940
- Tru-Ray® Construction Paper, 9" x 12", Classic Assorted, #P103031
- Tru-Ray® Shades of Me Construction Paper, 9" x 12", #P102949
- Prang® Clear Glue Stick, #X15083
Other Materials:
- Stapler
- Double-sided Tape
- Scissors
- Cricut Machine (optional)

Step One
Cover bulletin board with Retro Hopscotch Fadeless® Inspired by Schoolgirl Style™ Paper. To do this, first cut enough paper to cover the board. Find the center of the paper you’ve cut. Roll in edges in and secure at the bottom of the rolls with binder clips. Start securing the paper to the board by stapling at the top center. Roll the paper out to the left or right, stapling as you go. Roll out the remainder of the paper to the other side stapling across the top. Then staple down the sides and bottom, smoothing the paper as you go along. Cut off excess paper around edges.

Step Two
Next, cut the White Fadeless® Paper into a 13-1/2 inch tall strip to the width of your board and secure to your board.

Step Three
Cut some 1 inch strips of Tru-Ray Construction paper to edge the White Fadeless® Paper on the top and bottom.

Step Four
Next prepare bulletin board components. First either print the letters and cut out of Tru-Ray Construction Paper at 100% or, if using a Cricut, use our file at bit.ly/44lxs9M. Attach letters to the board.

Step Five
Have your students create self portraits using Tru-Ray® Vibrant Assorted Construction paper, Tru-Ray® Classic Assorted Construction Paper, and Tru-Ray® Shades of Me construction Paper. When completed, adhere them to the board above and below the white strip with the text.

Step Six
Lastly, cut some hearts for accents for the text area and adhere them to the board.

Step Seven
To complete the board, tape or glue Flame Bordette® around edges. Layer Canary Bordette® on top of the Flame Bordette®.